Are you tired of fumbling through various apps and settings just to figure out how to screen record on your iPhone XR? Well, worry no more!
In this step-by-step guide, we will walk you through the process of enabling the screen recording feature, accessing the control center, customizing options, and ultimately recording and sharing your screen.
Whether you’re a tech-savvy individual or just someone looking to capture a memorable moment on your device, this guide has got you covered.
So, let’s dive right in and unlock the power of screen recording on your iPhone XR.
Enable the Screen Recording Feature
To enable the screen recording feature on your iPhone XR, simply follow these easy steps.
- Go to the Settings app on your home screen. It’s the one with the grey icon that looks like gears.
- Once you’re in the Settings app, scroll down and tap on the Control Center option. This will bring up a list of customizable controls.
- Look for the Screen Recording option and tap the green plus button next to it. This will add the screen recording feature to your Control Center.
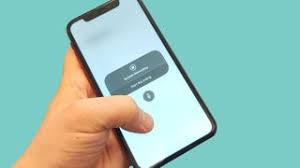
- Now, swipe up from the bottom of your screen to bring up the Control Center. You’ll see a new button with a white circle inside a white square. That’s the screen recording button.
- To start recording your screen, simply tap the button once. A three-second countdown will appear, and then your screen recording will begin.
- To stop recording, tap the red bar at the top of your screen and confirm by tapping ‘Stop’.
And that’s it! You’ve successfully enabled and used the screen recording feature on your iPhone XR.
Access the Control Center
Now that you have enabled the screen recording feature on your iPhone XR, let’s talk about how to access the Control Center.
Accessing the Control Center is essential for initiating the screen recording process. To access the Control Center, you need to swipe down from the top-right corner of your iPhone XR’s screen. Start by locating the battery icon in the top-right corner. Once you’ve found it, swipe down from the top-right corner, and the Control Center will appear.
When accessing the Control Center, make sure you swipe down from the right spot. If you swipe down from the top-left corner or any other area, the Control Center won’t appear. To avoid any confusion, it’s best to aim for the top-right corner.
Once the Control Center appears, you’ll see a range of icons and controls. Look for the red circle icon with a white dot in the middle. This is the screen recording icon. To start recording your screen, simply tap on this icon. A three-second countdown will appear, giving you time to prepare. After the countdown, your iPhone XR will start recording everything that happens on your screen.
Accessing the Control Center is a straightforward process that allows you to quickly initiate the screen recording feature on your iPhone XR.
Customize Control Center Options
You can personalize the Control Center on your iPhone XR by customizing its options to suit your preferences. This way, you can have quick access to the features that are most important to you.
To customize the Control Center, start by opening the Settings app on your iPhone. Then, scroll down and tap on ‘Control Center.’ Here, you’ll see a list of available controls that you can add or remove from the Control Center.
To add a control, tap the green plus icon next to it. To remove a control, tap the red minus icon. You can also rearrange the order of the controls by tapping and holding the three horizontal lines next to each control, then dragging it to the desired position.
Additionally, you can customize the Control Center options by adjusting the settings for individual controls. Simply tap on a control, and you’ll see options to customize its behavior.
Once you have customized the Control Center to your liking, simply swipe down from the top-right corner of the screen to access it at any time.
Start Recording Your Screen
To begin screen recording on your iPhone XR, simply follow these steps.
First, open the Control Center by swiping down from the top-right corner of your screen.
Next, locate the Screen Recording button, which looks like a circle inside another circle. Tap on it to start the recording.
You’ll see a 3-second countdown before the recording begins.
During the recording, a red bar will appear at the top of your screen to indicate that the screen is being recorded.
You can also access the Control Center while recording by swiping down from the top-right corner again.
To stop the recording, tap on the red bar at the top of the screen and select ‘Stop.’
A prompt will appear asking if you want to save the recording to your Photos app. Tap ‘Save’ if you wish to keep it.
And that’s it! You have successfully started and saved your screen recording on your iPhone XR.
Save and Share Your Screen Recording
Once you have finished recording your screen on your iPhone XR, you can easily save and share it with others.
Saving your screen recording is simple. After ending the recording, a preview of the video will appear on your screen. You can either tap on the preview to open it in the Photos app or swipe it away to dismiss it. If you choose to open it in the Photos app, the video will be saved in the ‘Screenshots’ album. From there, you can access it anytime you want.
To share your screen recording, go to the Photos app and open the video. Tap on the share icon, which looks like a box with an arrow pointing upwards. This will bring up various sharing options, such as AirDrop, Messages, Mail, and social media platforms. Select the method you prefer and follow the prompts to send the screen recording to your desired recipient.
Remember that screen recordings can take up a significant amount of storage space on your device, especially if they’re long or contain high-quality content. It’s a good idea to delete any unnecessary screen recordings to free up space on your iPhone XR.
Frequently Asked Questions
Yes, you can record your screen while using a specific app on your iPhone XR. It’s not limited to just the home screen. Just follow the step-by-step guide to enable screen recording.
You can record your screen on the iPhone XR for as long as you need. There is no time limit imposed, allowing you to capture footage of your screen for extended periods.
Screen recording on your iPhone XR may slightly affect its performance and battery life due to the increased usage of resources. However, the impact is usually minimal and shouldn’t significantly impact your overall experience.
Conclusion
Now that you know how to screen record on your iPhone XR, you can easily capture and share anything happening on your device’s screen.
By enabling the screen recording feature and accessing the control center, you can start recording with just a few taps.
Don’t forget to customize your control center options for easy access.
So go ahead, start recording and share your screen recordings with friends and family.